Uncategorized
Paint vs Stain – when & where
Paint:
Characteristics:
- Coverage: Paint forms a solid, opaque layer on the surface, hiding the underlying material completely.
- Durability: Paint is typically more durable and offers better protection against weather and UV rays.
- Variety: Available in a wide range of colors and finishes (matte, satin, gloss).
- Maintenance: Painted surfaces may chip or peel over time and require more maintenance.
Top 7 Best Uses for Paint:
- Interior Walls: Ideal for giving rooms a fresh, vibrant look and allowing for easy color changes.
- Exterior Walls: Provides strong protection against the elements and adds curb appeal.
- Trim and Molding: Enhances architectural details and provides a clean, finished look.
- Furniture: Allows for dramatic color changes and protects the wood.
- Doors: Offers durability and can create a standout feature with bold colors.
- Cabinetry: Transforms old cabinets with a new look and provides a durable finish.
- Metal Surfaces: Protects against rust and corrosion while adding aesthetic value.
Stain:
Characteristics:
- Penetration: Stain penetrates the surface, highlighting the natural grain and texture of the wood.
- Durability: Less durable than paint, but easier to reapply without extensive prep work.
- Variety: Available in various shades, from light to dark, but fewer color options compared to paint.
- Maintenance: Requires periodic reapplication to maintain the look and protect the wood.
Top 7 Best Uses for Stain:
- Decks: Enhances the natural beauty of wood while providing protection from the elements.
- Fences: Highlights the wood grain and offers protection from weathering.
- Wood Siding: Maintains the natural look of the wood and provides a rustic aesthetic.
- Outdoor Furniture: Preserves the wood’s natural appearance while offering protection.
- Log Homes: Enhances the natural beauty of the logs and provides weather resistance.
- Wooden Floors: Accentuates the grain and provides a warm, natural finish.
- Beams and Posts: Highlights the natural beauty of structural wood elements in rustic or traditional interiors.
Choosing Between Paint and Stain:
- Consider the Surface: Paint is better for surfaces that require more protection and color options, while stain is ideal for showcasing natural wood beauty.
- Desired Look: Choose paint for a more polished, uniform appearance and stain for a more natural, rustic look.
- Maintenance: Paint maintenance is more demanding and arduous but lasts longer. Stain is easier to reapply but may need more frequent touch-ups.
Both paint and stain have their unique advantages and ideal applications. The choice depends on the specific project requirements, desired aesthetics, and maintenance preferences.
Pro Painting Tips
Purchasing Paint:
Start by committing to a color. If you are not committed to a color, buy a quart first instead of a large quantity. Buying paint in a large quantity prematurely is too expensive to risk. Paint a piece of foam board and move it around the room to see how the light affects the color at different times of the day.
- Know the square footage of the room you are painting before you head to the store. The pros recommend one gallon for every 400 square feet. Covering textured, rough or unprimed surfaces may require more.
- Don’t apply latex on an oil finish and vice versa without first sanding the walls (remember to wear a mask) and wiping away the dust particles with a tack cloth. Apply a primer of the same composition (oil or latex) of the intended topcoat. To tell whether your current wall color is water- or oil-based, douse a white cloth with rubbing alcohol and rub it on the wall (in an out-of-the-way spot). If the paint softens and begins to transfer onto the cloth, it is water based. If the alcohol does not remove any color, it is oil-based.
- Don’t underestimate how long it’ll take you to get the job done. Allow at least 24 hours to dry before bringing everything back into the room. Allow two weeks to 30 days to cure before washing or wiping. (buying paint to cover area)*
Preparing Painting Surface
- Paint doesn’t stick very well to dirty walls, so clean them with soap and water (or TSP) and rinse with water once done. Let dry overnight.
- Clean ceilings before painting. There will be cobwebs and dust that you just don’t see. Use an old paintbrush or china bristle brush to dust baseboards, trim and crown molding before taping them off (use painter’s tape with paper attached to protect the baseboards). Overlap the tape seams by at least an inch to avoid seepage between pieces, and then seal the tape to the surface with your fingers or a rag.
- Don’t cover the floors with plastic as it can be very slippery. Use drop cloths or old sheets to protect them from splatters and drips.
- The color mixer at the paint store can create slight variations from can to can. The last thing you want is to have two shades of a color on the same wall. This can be remedied by mixing all of the paint cans together before you start painting to ensure you will have consistent color throughout the room.
- Fill holes with spackle using a five-in-one tool or wide blade and caulk where necessary. Sand dry spackle smooth, and prime each spot.
- Removing outlet covers makes for a much neater paint job. Tape the screws to the cover, and tape over the outlet or light switch to keep paint from getting on them.
Time-Saving Options
- Use an edger instead of painter’s tape. Buy a good quality edger (they’re fairly inexpensive) and take your time in the corners so that you don’t spend all the extra time taping off everything.
- A 2-inch angled-sash brush can also be used for cutting into corners.-Hold it like a pencil and paint a steady line.
- If you take a break while painting, cover rollers in plastic wrap and refrigerate so that you don’t have to clean them every time you stop.
- Consider skipping the paint trays and using a five-gallon bucket with a roller screen inside. This saves time on filling and re-filling the bucket.
- Use a hammer and nail to poke holes in the rim of the paint can. It allows the paint to drip back inside the can after you pour it out. (buying paint to cover area)*
Tools Needed
- Use a nylon-bristle brush for water-based paint and natural bristles for oil-based paint. Do not use natural bristles with water–based paint, the water can make the bristles limp. Foam brushes are good for intricate work such as painting molding or window casings. These brushes usually last for only one use because they’re hard to clean and easy to tear.
- If your project requires oil-based paint, natural bristles like ox or hog hair are perfect because they hold paint better than synthetic bristles.
- If you’re using latex paint, then nylon and polyester brushes are much better because they don’t absorb water like natural fibers.
- Good all-purpose brushes are flagged, meaning the bristles vary in length gradually coming to a peak in the middle of the brush. Flagged brushes provide a smooth, even, more precise layer of paint.
- Use the right roller for the job. For smooth surfaces like wallboard and wood, use a roller with a 3/8-inch or less nap. For surfaces with heavy texture, larger naps can reduce the number of coats — and the amount of time spent painting.
Clean Up
- Use soap and water to clean latex paint off the brush immediately after painting. If the paint dries on the brush, you’ll need special solvents to remove it. If your house is on a public sewer system, you can clean the brushes in your sink, but be careful not to dispose of paint in an area where it might seep into the groundwater.
- For oil-based paints, you’ll need a solvent such as paint thinner or mineral spirits. Pour about two inches of thinner into a metal container and swirl the dirty brush in it until the paint comes off.
- Moist paintbrushes can be wrapped in plastic or waxed paper and sealed with a rubber band or aluminum foil. Hang brushes upside down to maintain their shape.
- Keep a stash of paint for touch-ups in a small plastic cup or glass jar, like margarine containers or baby food jars (thoroughly cleaned, of course). Be sure to label each container with the color and brand name.
If you have any more painting questions, or need help choosing the perfect fall color, visit our experts at one of our 4 locations or for further immediate tips, visit:
https://www.benjaminmoore.com/en-us/interior-exterior-paints-stains/how-to-advice
Ben Moore’s best painting tips
- Prepare the surfaceClean walls with warm water and a sponge, remove mildew, and prime the walls.
- Select the right toolsYou’ll need a high-quality roller sleeve and handle, a pan, an extension pole, and a stepladder.
- Cut in the roomUse a 21⁄2-inch angle sash brush to paint along the ceiling line, corners, windows, doors, molding, outlets, and switches.
- Roll the paintPlace a liner in your paint tray, pour paint into the tray, and roll the roller along the raised roll-off area of the pan to load it. Touch the paint without completely immersing the sleeve, repeating until the roller is fully saturated. Start by working the paint into the wet edge of the wall, then make a W pattern working out from the wet area. Fill in the W by working across from the wet area into the dry.
- Apply multiple coatsBenjamin Moore recommends two coats to achieve full color development and to optimize performance. On bare substrates, two coats are recommended; previously painted surfaces can be finished with 1 or 2 coats.
- Cut in for every layerIt is recommended to cut in for every layer of paint you add. Once the layer of paint is dry, cut in for the second time and then roll out again.
- Test the paintTest the paint on a piece of poster board that you can move around the room to see how it reacts to colors that are there and will be there after you’ve painted.
COLOR TRENDS 2024
February is a great project month if you have President’s Day off or even the whole week and are not inclined to ski.
Help is available! When in doubt use the most trusted resource at your fingertips to help you sort out your ideas and guide you to perfection.
First, reach out to any one of our stores, and our on-site professional decorators are there for you as well as all the staff. Second, the Benjamin Moore website is a great source to get visual ideas of what your upcoming project could look like and keeps you up to date with trends like this year’s color of the year 2024 – Blue Nova 825.
Go to: https://www.benjaminmoore.com/en-us
Start by determining your budget and then the must-haves and the dream-haves. We can help you get to as many or all of the dream-haves as possible but it takes planning and preparation.
Saving on the labor, if you are handy yourself, is a great way to extend the buying power of your budget. Note that you will need more time to complete the job compared to a professional who does it every day so factor that in especially if you are trying to meet a deadline.
Have fun and good luck!
Front Entrance Splash
Front Door ColorIdeas & Inspiration
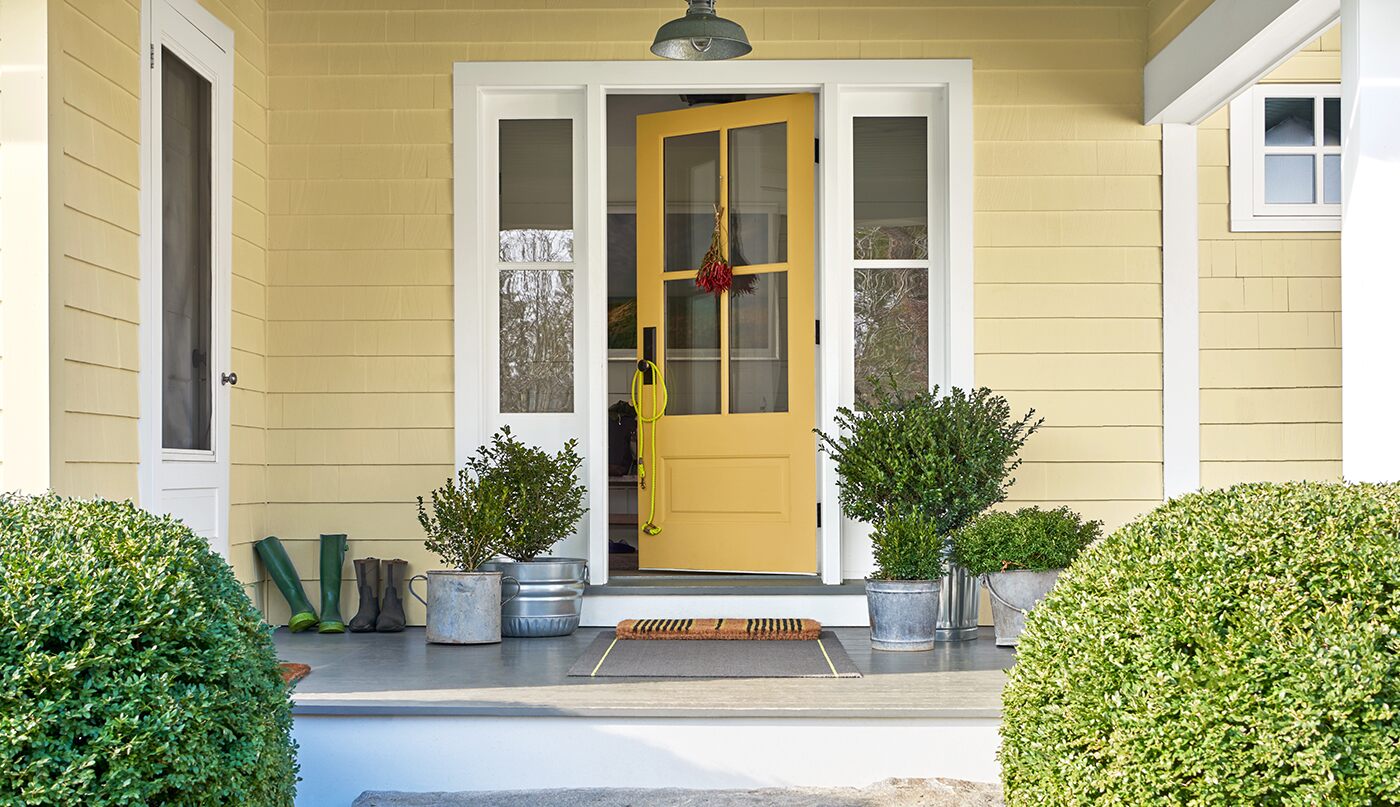
Ready to paint your front door? Whatever style and color you choose, Benjamin Moore is here to help guide you to a perfect hue you’ll love for years to come.
A new front door color is the perfect way to extend a gracious welcome to family and friends and in doing so, perk up your home’s façade. We recommend any of our 3,500+ colors and give your front entrance the refresh it deserves.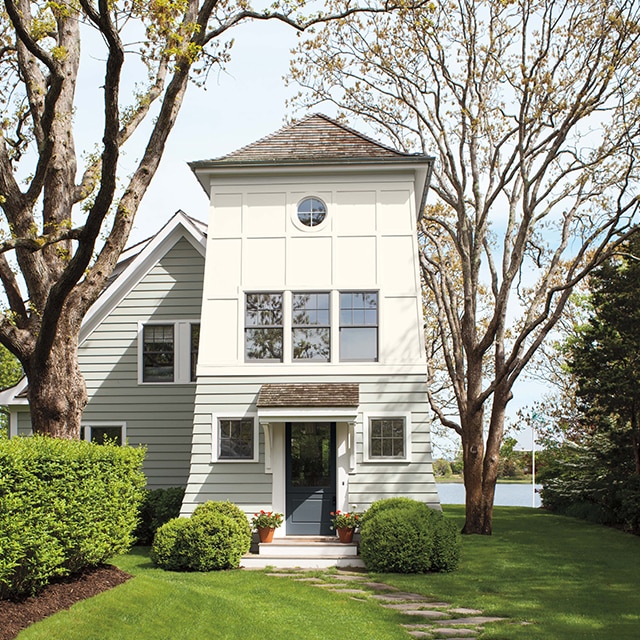
The Complete Look
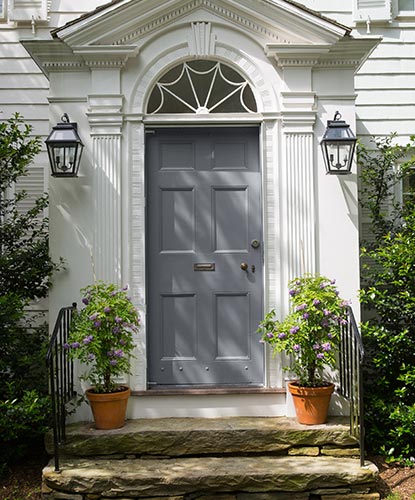
When choosing a color for your front door, ensure cohesion by taking the entire palette of your exterior into consideration. Your front door should act as the perfect accent to your home, including siding, landscaping, and décor.If you’re looking for a classic front door color, we love Heritage Red HC-181, Hawthorne Yellow HC-4, Kendall Charcoal HC-166, and shown here, Wolf Gray 2127-40.
If you lean neutral on your exterior, but are looking to garner attention for your door, try a saturated and playful hue like Hot Lips 2077-30, Green Meadows 2040-20, or Sweet Pear 389.
Black Front Doors
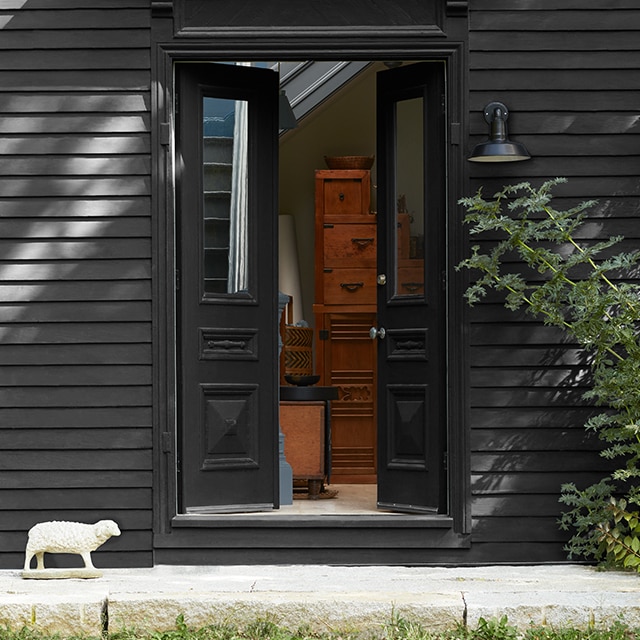
There’s no doubt that a black front door makes a statement. If you have black siding on your home, consider painting your front door the same color for a sleek, monochromatic look. You can even opt for a dark gray or charcoal, if you’d prefer something lighter than black. For a more traditional look, opt for a classic black painted door with a lighter neutral exterior. This creates a sophisticated contrast with a bold entrance.Black paint colors we love for doors include:
- Black HC-190, shown here
- Onyx 2133-10
- Iron Mountain 2134-30
Colorful Front Door Ideas
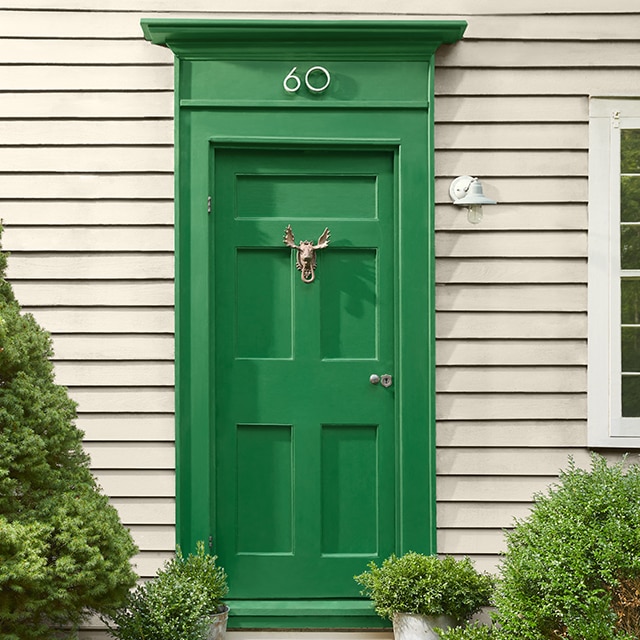
Even if your home exterior trends neutral, showcase your personality with a pop of bright color on your front door. Use a rich, saturated paint color that complements your home’s architecture and highlights your landscaping.You can use any color to brighten up your front entrance, but we especially love yellow and green front door colors to really amp up the friendly welcome. Here, bright and welcoming Cactus Green 2035-20 pops against Edgecomb Gray HC-173 siding, while bold house numbers and gold accents add a whimsical touch.
Harmonious Colors for a Front Door
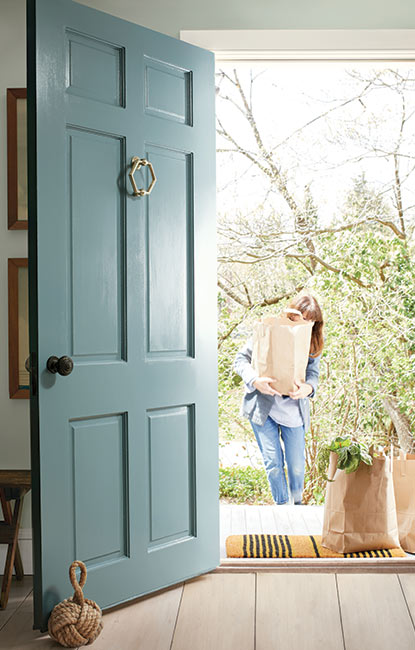
When thinking about painting your front door, take color cues from the paint colors inside your home. What paint colors does your front door open into? Take inspiration from your interior for your front door, as seen here with Aegean Teal 2136-40, the Color of the Year 2021, on the front door as a lovely extension of the soft blue-green Gray Cashmere 2138-60.Are your interiors painted neutral or white? Make the case for a white front door. With its unrivaled versatility, white paint is transcendent and timeless, and will provide a blank canvas for seasonal décor, accents, and more.
Give your door a clean, crisp look with these white paint colors:
Neutral Paint Colors for Doors
If your home’s siding is already a bold color, look to more neutral options for the front door.Love the idea of a bold color on your front door, but not quite ready to commit? Try out a deep neutral paint color with a prominent undertone. Here, two saturated neutrals come together to create a cool, inviting look. Horizon OC-53 siding helps to anchor other exterior hues, while Sea Life 2118-40 on the door adds character.
When it comes to choosing paint for your front door, you need an exterior paint that provides beautiful color and offers excellent protection, no matter the weather. Element Guard® protects against wind-driven rain, excessive humidity and other harsh conditions. Available in all of Benjamin Moore’s 3,500+ hues, it resists cracking and peeling, and retains its color for long-lasting beauty.

